 Happy Life Games
Light Path Guide: Bounce the Laser, Light Every Crystal
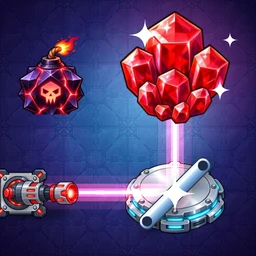
In Light Path, a laser fires across a dark grid, and a handful of crystals wait to be lit. You get a small tray of mirrors, exactly as many as the level needs, and you have to place them so the beam bounces through every crystal. Some cells hold rocks that block the light, some already hold locked mirrors, and later on there are bombs that must stay dark.
It's a puzzle about seeing angles. Once you can picture where a beam goes after a bounce, each level becomes a small chain of logical steps from the laser to the last crystal.
Rules and controls
- Drag a mirror from the tray under the board onto any empty cell. While you hold it over a cell, the beam updates live to show where the light would go.
- Tap a placed mirror to flip it between the two diagonals, "/" and "\".
- Move a mirror by dragging it to another empty cell. Drop it off the board to return it to the tray.
- Mirrors turn the beam 90 degrees. A "/" mirror sends a beam moving right upward, and a "\" mirror sends it downward.
- Rocks stop the beam. So does the edge of the board.
- Locked mirrors, marked with a padlock, are part of the board. They bounce the beam like your own mirrors, but you can't move or flip them.
- Win by lighting every crystal shown in the goal strip above the board, without the beam touching a bomb.
The buttons below the board let you restart the level, ask for a hint, or skip. There's no undo button, but every move can be reversed by hand: flip the mirror back, or drag it off the board.
Beginner strategy
- Trace the beam as it is. Before placing anything, follow the light from the laser. Note which crystals it already passes and where it stops.
- Find where the first turn must happen. The beam only travels in straight lines, so any crystal not in its current line needs a mirror somewhere on that line to send light toward it.
- Line up with a crystal. A useful mirror sits where the beam's line crosses a crystal's row or column. Put the mirror there and flip it so the beam turns toward the crystal.
- Follow the new beam. After each placement, trace the light from the mirror onward. The rest of the puzzle continues from that new path.
- Use every mirror. From level 3 the game reminds you that every mirror counts. The tray holds the minimum needed, so a mirror that doesn't change anything is in the wrong place.
Advanced techniques
Work backward from the hardest crystal
The nearest crystal is rarely the problem. Look for the crystal that seems hardest to reach, tucked behind rocks or off in a corner, and ask which row or column the beam must be traveling along to hit it. Then work backward: where could the beam be turned into that line? Planning from both ends usually reveals the full route.
Don't take the obvious first mirror
Most levels are designed so that the tempting first placements fail: putting a mirror where the beam currently ends, or wherever lights the most crystals right away. If your first idea lights two crystals but leaves the third impossible, try turning earlier or later along the same line.
Put locked mirrors to work
Locked mirrors are not only obstacles. If your beam can reach one from the right direction, it becomes a free bounce. Some solutions route the beam into a locked mirror on purpose, so check what each one does before planning around it.
Use the live preview
While dragging a mirror, hover over different cells and watch the beam redraw. It's the fastest way to test an idea without committing to it. Hovering also shows you which bombs a placement would hit before you let go.
Common mistakes
- Forgetting to flip. A mirror in the right cell but the wrong diagonal sends light the opposite way. Tap it once and look again.
- Lighting crystals by accident and stopping there. A path that lights most crystals can still be a dead end if no mirror remains for the rest.
- Ignoring the bombs. Bombs sit in line with the beam's route, so a careless bounce often runs straight into one. Hitting a bomb makes the board shake, and the level won't count as solved.
- Overlooking color. Once filters appear, a crystal only lights when the beam reaching it has the same color.
What changes in later levels
The first boards are five-by-five with a single crystal. Grids grow to seven columns and up to eight rows, and the number of mirrors you need climbs from one to four. Each new element gets its own teaching level, where it appears alone:
- Level 6: bombs. Dark crystals that must never be hit by the beam.
- Level 11: glass filters. The laser starts red. Passing through a filter recolors the beam green or blue, and crystals of those colors only light up with the matching beam.
- Level 16: prisms. A prism splits the beam in two, sending one beam off to each side at right angles. Both beams then need to be considered, which can light crystals in two directions at once.
- Level 21: one-way glass. Light passes only in the direction of the arrow. A beam arriving from any other direction is blocked.
After their teaching levels, these elements mix together. Every tenth level is a larger boss board with more crystals and more mirrors, and the level after it is a little easier.
FAQ
How many mirrors do I need?
Exactly the number in the tray. Each level is solved by a computer to find the fewest mirrors that work, and that's what you get.
What does the hint do?
It shows the next step toward a solution: a ghost mirror where one should go, a mirror to flip, or a mirror that should come off the board.
Can the beam pass through a crystal?
Yes. Crystals light up as the beam passes through them, and the beam keeps going. One straight line can light several crystals.
Why didn't a crystal light up even though the beam touches it?
The colors probably don't match. Check whether the beam passed through a filter, and which color the crystal is.